
01 / PHYSICAL PLANNING
Rack elevation planning Know what fits before the hardware arrives.
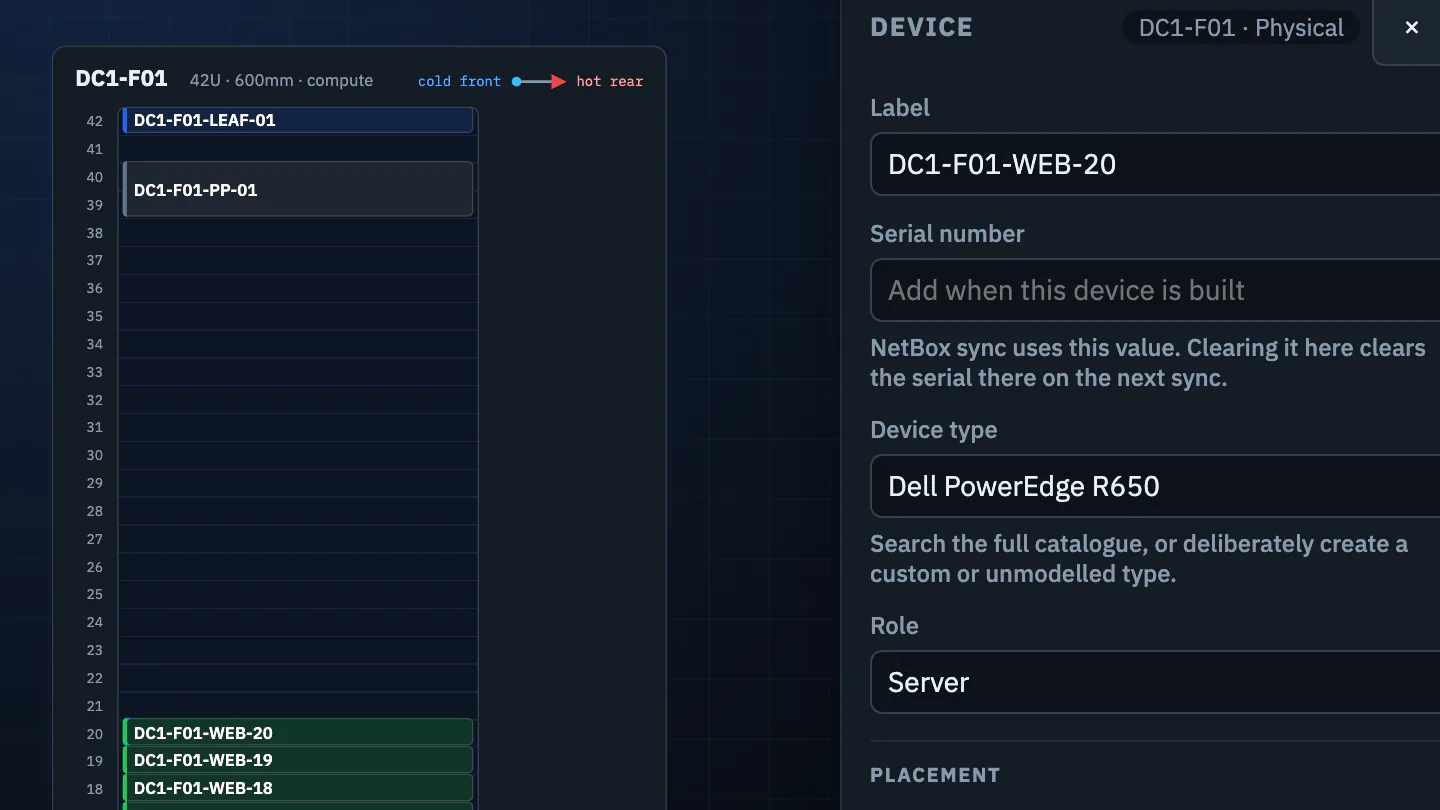
Build a rack elevation that shows the actual unit positions your team intends to use. Place devices on the front or rear, see empty space at a glance, and keep the equipment plan alongside its power and cabling context.
Explore the example first; an account is needed to save your own work.
THE JOB TO DO
A rack drawing should answer the installer's questions
A device list tells you what to buy; an elevation tells you where it goes. Before ordering rails or booking an install, you need to see whether the proposed units overlap, which face the equipment uses, how much space remains and which rack holds it. Railyard keeps that placement in the same project as your other physical design work.
THE WORKFLOW
Plan a rack in three moves
Set the cabinet
Create a rack from a reusable type with its U height, width, depth, power budget and weight limit. Number it from the top or bottom to match the site convention.
Place real equipment
Choose a device type from the built-in catalogue or define a custom type. Position it in the numbered grid and set its front or rear face. Move or resize placements as the design changes.
Review the whole rack
Switch from Physical to Power or Cabling without rebuilding the rack. Check power and weight roll-ups, then inspect the ports and feeds that belong to each placed device.
THE RESULT
Use the elevation as the shared plan
A consistent rack view gives designers, installers and reviewers the same U positions to discuss. When a device moves, its label and placement stay attached to the project instead of drifting across separate drawings and spreadsheets.
SEE IT IN CONTEXT
Start with a real example estate.
Follow one guided task, then inspect how the rack, cables, power and export fit together.